Leek, Mushroom & Cheese Tart

Lately, it’s been raining with no sign of a reprieve coming anytime soon–day after day of rain. And if you’re anything like me, weather like this makes you crave a warm and comforting dinner that’s sure to raise your spirits. This cheese, leek and mushroom tart with a bread crust does just that–so well so, that you’ll even want to whip it up when it’s nice and sunny outside!

I’ll be the first to admit it, I was a little late to party on the leek front. I didn’t eat one until last summer, and I’m kind of mad at myself that I waited that long, because ever since trying them, I’ve been obsessed. Since leeks are of the same genus as onions, garlics, shallots, scallions and chives (the genus Allium), when cooked, they take on a mild onion taste and smell, and become meltingly tender (honesty, they’re just so good). It’s this mild onion flavor and creamy, soft texture once cooked that make leeks the perfect vegetable to pair with some cream, cheese, garlic, mushrooms and pepper, if you want to create a delicious, savory tart.

Just look at these handsome leeks! These are best looking leeks I’ve ever cooked with.

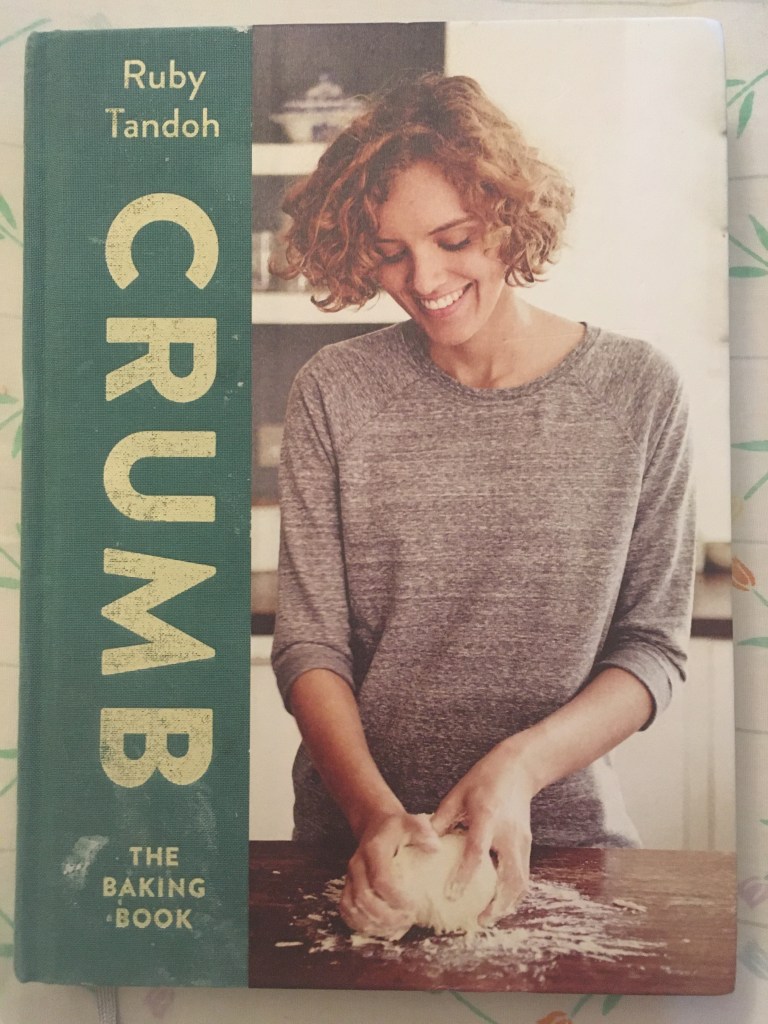
I found the base for this recipe in Ruby Tandoh’s cookbook, Crumb, which is absolutely scrumptious! After making it a couple of times, though, I decided I wanted to make this recipe my own by making a couple of changes. First of all, this recipe calls for crème fraîche, which is expensive. Now, someone out there in the cooking and baking world is going to be offended by this, but essentially, crème fraîche is just a less sour and more fatty version of sour cream. Knowing this, I just substitute the called for crème fraîche for less expensive, sour cream. To compensate for the fact that sour cream has a more sour taste and less fat, I add more seasoning and cook the tart for about 10 minutes longer than I would if using the crème fraîche.

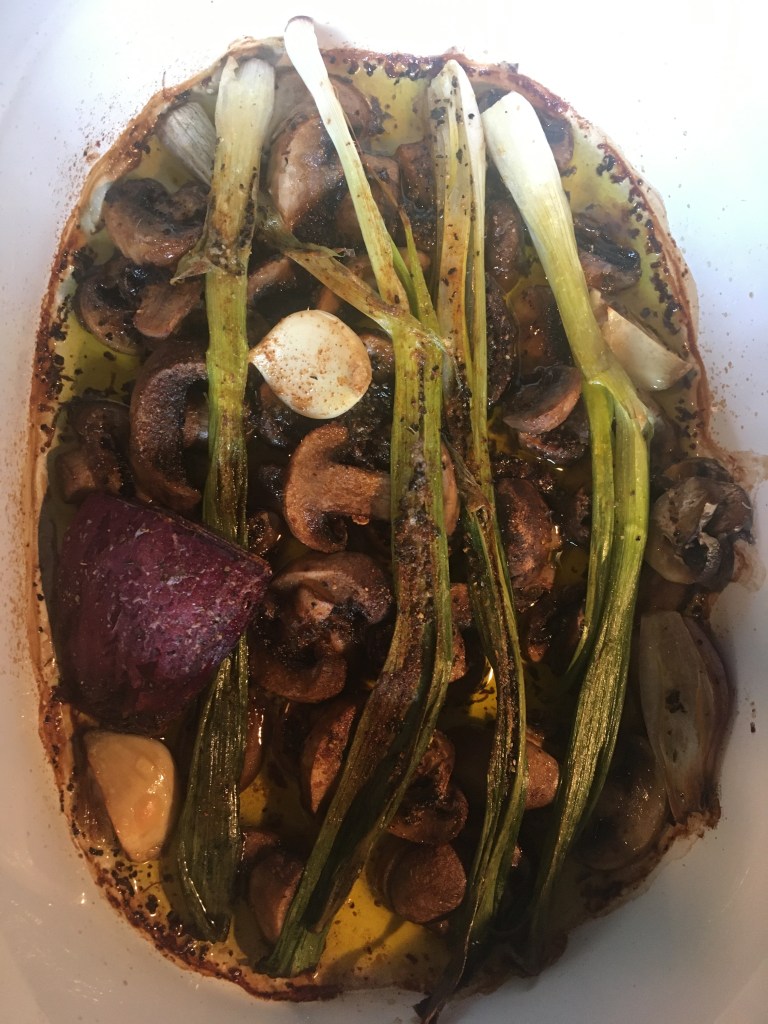
Another thing I do differently is add in some mushrooms to give the tart another level of exciting flavor and texture (I would try making this pie both ways, with just leeks and then with the mushrooms added in, because I honestly love both versions). Since the leeks need longer to cook than the mushrooms, I throw the mushrooms into the pot of leeks when the leeks have 10 minutes of cooking time left.

Finally, I like to add a little bit more seasoning to my tart. Maybe I overdo it on the spices, but I’m more of a, “let’s punch someone in the face with this flavor,” rather than a subtle flavor type of person. So, I add a ton of pepper (the gruyere cheese is very rich, so the pepper works to cut through all that richness), some salt, garlic powder, Cajun seasoning, nutmeg, and you guessed it, chili powder. I just think that these spices really work to enhance the flavor of the leeks. If you don’t like spicy food though, I’d say just leave out the Cajun seasoning and chili powder, but keep the pepper, salt and garlic powder (although you can honestly do whatever you want to do; it’s your tart).

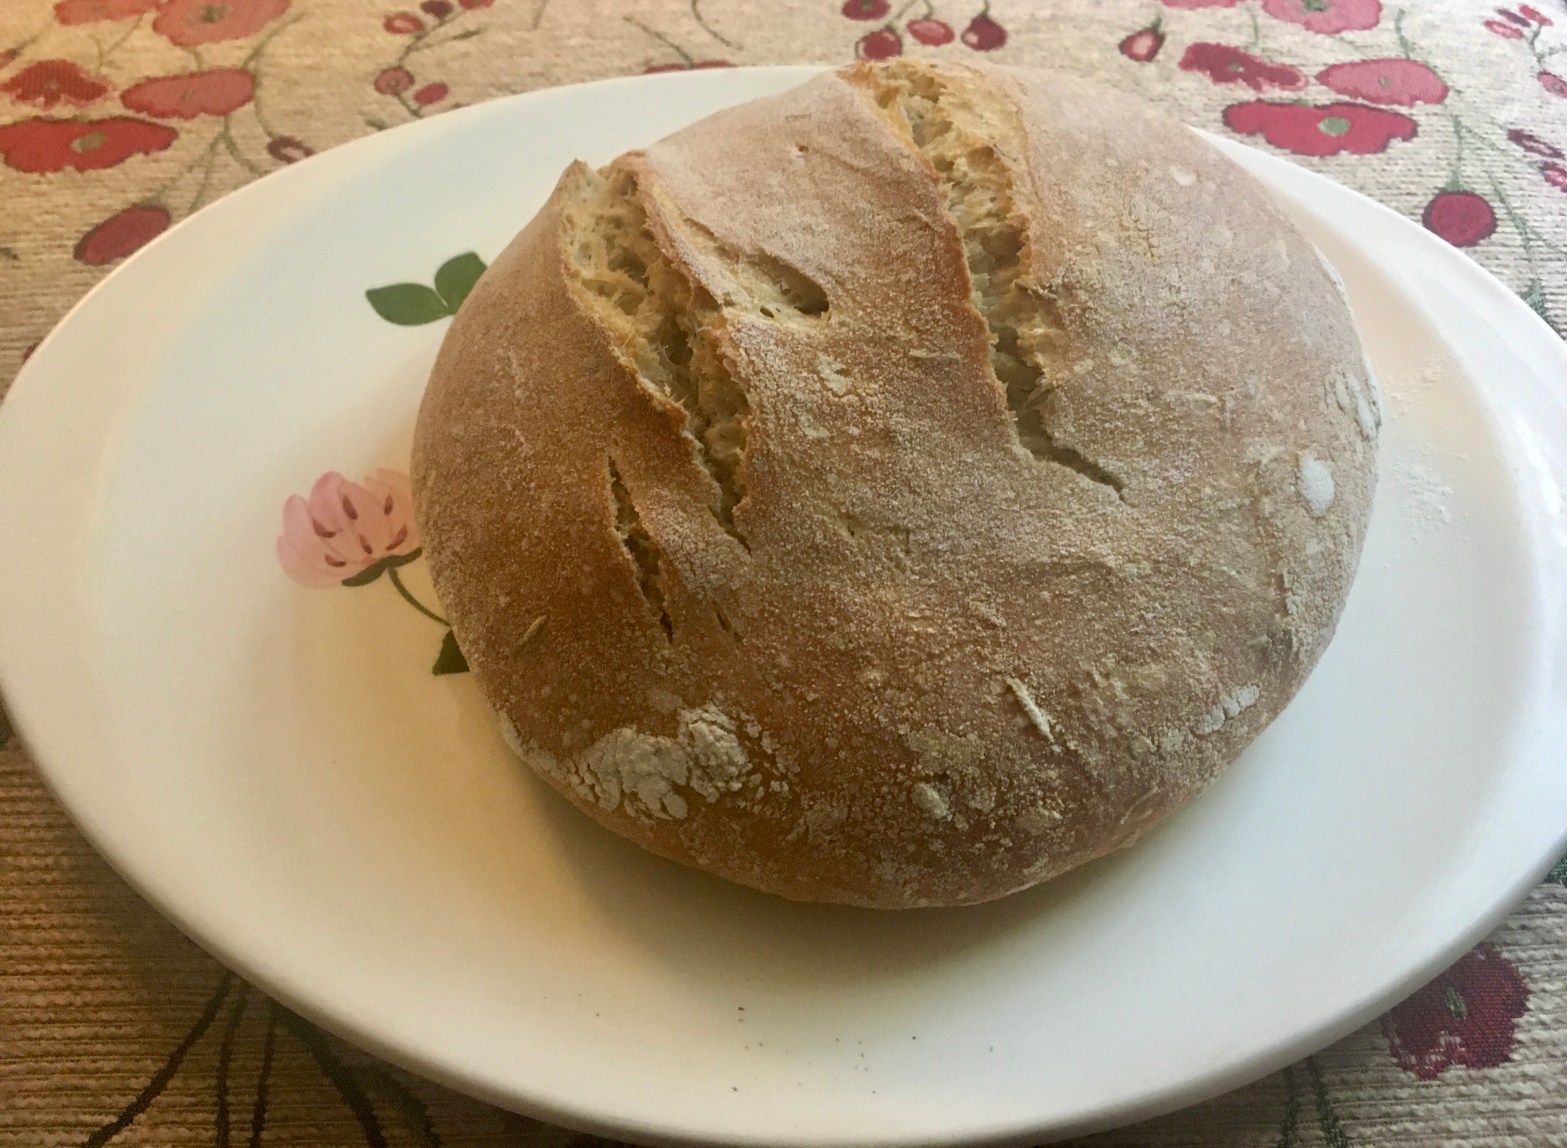
Now that I’ve gone through all the changes I make when cooking this tart, there is one sacred piece to this tart puzzle that can never be changed, and that’s the bread crust. This is not your traditional crust; it’s soft, chewy, buttery and everything you never knew you needed in a crust. I was speechless the first time I tasted it; this crust tastes that good. When you pop the tart in the oven, the crust will experience one final rise, causing the tart to take on a beautifully round dome-like look on the top. In addition, the edges of the crust will become crispy and crunchy, working to counteract all of the soft textures going on inside of the tart. Real talk here, I just can’t imagine a crust being any better than this one.

This crust is the crust of my dreams…

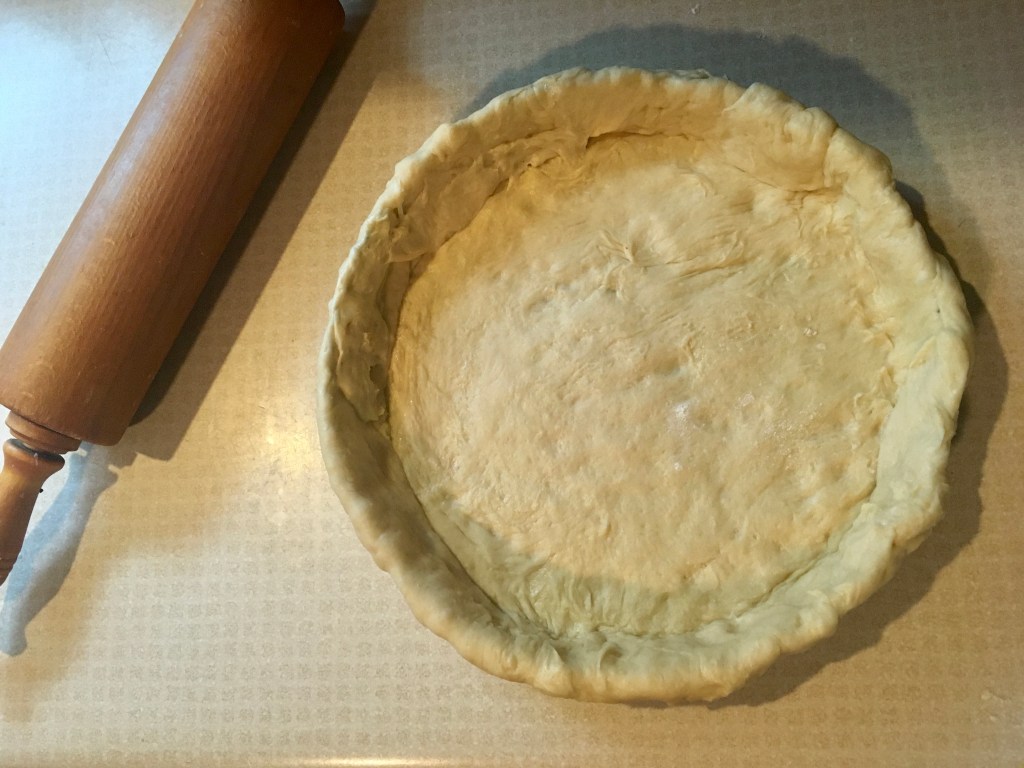
Due to it’s bread-like nature, this crust is going to need to rise for an initial 1 and 1/2 hours, and then once it’s rolled out and placed in a pie or tart pan, it’ll need an additional 30 minutes of rest in order for the dough to have time to puff up again. After it’s final rest, the filling can be added. You’ll notice that this recipe also calls for bread flour. Now, normally I would say you can just substitute all-purpose flour, but if you want a really chewy and mind-blowing crust, I would use the recommended bread flour. The extra gluten in bread flour allows the crust to become chewier than if all-purpose flour is used (but do what you’ve gotta do, man).

If that’s not beauty, then I don’t know what is.

And that’s it! Just let the tart sit for a couple of minutes after it comes out of the oven before diving in!

Here’s the recipe:

Leek, Mushroom & Cheese Tart

Servings: 6 | Total Time: about 3 hours

Ingredients:

FOR THE CRUST:

  • 250 grams bread flour
  • 1 tsp active dry yeast
  • 1/2 tsp sugar
  • 110 ml warm water
  • 1 ½ tsp salt
  • 1 large egg
  • 50 grams unsalted butter, softened

FOR THE FILLING:

  • 50 grams unsalted butter
  • 400-500 grams leeks, washed, trimmed & sliced
  • 6 whole, white mushrooms (or your choice), sliced into chunks
  • 300 ml sour cream or crème fraiche
  • 150 grams gruyere cheese, grated
  • 2 large eggs, beaten
  • Nutmeg, salt, pepper, Cajun seasoning and chili powder, to taste
  • 1 egg, beaten, to glaze (optional)

1 LARGE pie or tart pan

Directions:

Step 1: Activate the yeast by mixing the yeast and sugar in the warm water. Let this mixture sit for about 10 minutes, until the mixture becomes foamy on top. In a large bowl, mix this yeast mixture together with the flour. Then add in the salt and egg, using your hands to roughly combine the mixture. Knead this for about 10 minutes, or until the dough is stronger and elastic. Then knead in the soft butter until it is fully incorporated into the dough. Let the dough rise in a large, covered bowl at room temperature for 1 ½ hours, until doubled in size.

Step 2: While waiting for the dough to rise, melt the butter in a large pot and then stir in the leeks. Cover the pan with a lid and cook the leeks on low to medium heat for 15 minutes, stirring occasionally. After 15 minutes, add in the mushroom, cover again, and cook for an additional 10-15 minutes, until the leeks are meltingly tender. Once you reach this stage, set the mixture aside to cool.

Step 3: Once the dough has doubled in size, tip it onto a clean, lightly floured work surface. Roll the dough into a large circle that is big enough to line the bottom and sides of your pie or tart pan. Line the pan, making sure to both press the dough into the corners and push a little around the sides so that the dough hands over the top of the pan a little. I like to fold this overhand under the rim of the pan and tack it down to make sure that the dough won’t slide down the inside of the pan during its proving time. Let the dough prove in the pan for 30 minutes. Meanwhile, preheat the oven to 400º F.

Step 4: While the dough proves again, use this time to finish up the filling. In a large bowl, stir together the sour cream, eggs, nutmeg, salt, pepper, Cajun seasoning, chili powder, and cheese. Then add in the cooled leek, mushroom and butter mixture. Make sure to go heavy on the pepper in order to cut through the filling’s richness. After the dough’s proving time is up, spoon in the filling.

Step 5: If using the beaten egg to glaze, at this point, brush it onto the rim of the dough. Bake the tart for 40-50 minutes. When fully cooked, the tart should be golden brown on top and the crust should look well risen. Wait a couple of minutes after taking it out of the oven before cutting into it.

Happy baking / cooking!:)

Sour Cream Flatbread with Roasted Veggies

Need some good, old-fashioned carbs back in your diet? Are you craving some Indian naan bread, but are too lazy to leave the house? If you answered yes to any of these questions, then this fluffy, buttery sour cream flatbread recipe is for you.

If the thought of an Indian naan-like flatbread topped with some oil roasted mushrooms, green onions, red onion, garlic, a smattering of ricotta cheese, and a dash of chili powder speaks to your soul (or stomach) right now, boy, have I got a recipe for you. I don’t want to sound too cocky, but I can assure you, this sour cream flatbread is just the carb-fix you’ve been needing. It’s fluffy, soft and buttery, all at the same time, reminding me of a nice, thick piece of naan that you get at an Indian restaurant. I found this fantastic recipe in one of my adventures into the depths of Alison Roman’s cookbook, Dining In, and made just a couple of tweaks (obviously, some chili powder and Cajun seasoning were added).

As mouthwatering and delicious as it is, the bread isn’t the only star of the show with this recipe. The flatbread topping–mushrooms, red onion, garlic and green onions (or whatever vegetables you want to throw in there), all roasted in a luxurious bath of olive oil–makes this dish absolutely perfect. Roasting the vegetables in a pool of oil works to bring out their different individual flavor profiles better than if you were to just roast the vegetables with a light drizzling of oil over the top of them. Once you start roasting your veggies this way, I promise you, you won’t got back. (Welcome to the dark side.)

You don’t have to top the flatbread with roasted veggies, ricotta and chili powder; it’s just a suggestion (a very strong one). You can also make this flatbread to soak up any leftover curry on your plate, or as a vehicle to transport beautifully silky, creamy hummus or tangy tzatziki dip from the container to your mouth. Whatever way you chose to do it, you can’t go wrong.

This recipe calls for a total of four hours resting period for the dough. Please abide by this request. I’m lenient on the topping, but for this, I’m a stickler. If you want your bread to be unbelievably soft and fluffy, it needs these four hours to relax the gluten. Oh, and don’t forget to punch it down after the first two hours!

When there’s one hour left on the dough’s rising time, I would recommend getting the vegetables ready. For the mushrooms, just slice them into thin chunks, the green onions, slice each one in half lengthwise, the red onion, cut it into thin slices and the garlic, just peel and throw them in halved. Honestly, how you cut the vegetables is entirely up to you and your own preference, this is just how I like to do it. Anyway, once all of the vegetable have been cut, arrange them in a baking dish and pour 3/4 cup of olive oil over top. Generously season them with salt and pepper (I add a little cajun and chili powder too, because I like things a little spicy) and then just pop the dish into the oven for around 30 minutes.

Those veggies are just asking to be photographed.

Once your four hours of bread proving are up, it’s time to bake your flatbread. You can choose to bake the bread in the oven, or in a skillet (you can also use a griddle or cast-iron skillet) on the stove top; these different baking methods will yield different results. Baking the bread in the oven, will make the bread a little dryer and pizza dough-like; whereas, if you bake/cook the bread on the stove top, your bread will be softer, fluffier and more reminiscent of naan bread. I’ve tried both ways and personally, cooking it on the stove top is way better.

When cooking your flatbread, no matter the method of baking, you’re going to need to work in batches, and depending on how big you want them to be, you can have anywhere from 8 to 10 flatbreads (I think I made about 8). When shaping the bread, don’t use a rolling pin! You’re going to want to use your hands and gravity to stretch the dough (like when making pizza crust). With this dough, you want it to be really thin so that way it’ll cooked all the way through; just be sure that you’re not making it so thin that you’re creating a bunch of holes in the dough.

If you choose the stove top method, make sure that you add more oil to the skillet/griddle as needed (and you will need to add more each time you cook a flatbread). The oil helps to color the bread, adding the spots of dark brown that you want on your flatbread. Don’t forget to flip the bread after about 3 minutes and then let it cook on the other side for another 2 to 3 minutes. Most of the time, each bread will take about 5 minutes each (it all depends on the heat of your skillet). Sometimes though, a piece could take up to 8 minutes to gain the dark brown color you want, but I wouldn’t leave it on the skillet for more than that, or else the bread will start to dry out. If your bread needs longer than 8 minutes, I’d turn up the heat and add a little more oil (if the skillet looks dry).

The dark brown spots are what you want. Honestly, you want them even darker than this. Little burnt spots are preferable here!

If you decide that a pizza crust-like flatbread is the one for you, choosing to cook it in the oven, be sure to give the bottom of your cookie sheet a healthy dose of olive oil before placing the dough on top. You’re also going to want to drizzle the top with olive oil, too, before putting it in the oven. They’ll need about 8 to 10 minutes in there.

A nice tall stack of flatbreads.

After you’ve successfully cooked all of your flatbreads, it’s assembly time! I like to top my flatbread with a layer of ricotta, followed by a layer of the roasted vegetables, and then sprinkled with a little more salt and some chili powder. You can tear off bits, or just pick it up and eat it like a piece of pizza. It’s entirely up to you–it’ll be delicious no matter how you do it!

I know this is the featured image for this post already, but it just looks so good that I wanted to put the picture in again.

Here is the recipe:

Sour Cream Flatbread with Roasted Veggies

Makes about 8-10 flatbreads | Total time: 5 hours

Ingredients

FOR THE ROASTED VEGGIES:

  • 1 package mushrooms, sliced
  • 2 green onions, sliced in half lengthwise
  • ½ red onion, sliced thinly
  • 2-3 cloves garlic, peeled and halved
  • ¾ cup olive oil
  • Salt, pepper, rosemary and thyme, to taste

FOR THE FLATBREAD:

  • 1 package active dry yeast (2 ¼ tsp)
  • 1 tsp sugar
  • 1 ½ cups warm water
  • 4 cups all-purpose flour
  • 1/3 cup sour cream
  • 2 TBS unsalted butter, melted
  • 1 TBS salt
  • Olive oil for cooking / baking

FOR EATING:

Ricotta cheese

Salt and chili powder, to taste

Directions

For the roasted veggies:

Step 1: Preheat the oven to 400º F. Place the mushrooms, green onions, red onion and garlic into a baking dish. Cover the veggies with the olive oil and season with the salt, pepper, rosemary and thyme, to taste.

Step 2: Place the dish into the oven to roast for 35-45 minutes, or until the mushrooms are caramelized and dark brown in color.

For the flatbread:

Step 1: In a large bowl, pour in the water. Then mix in the yeast and sugar. Leave the bowl alone to let the yeast activate, about 10 minutes, the should mixture become foamy on top. Once the yeast has activated, stir in the flour until there are no more dry stops. Cover the bowl with plastic wrap and let sit for about 10 minutes. This time will allow the flour to hydrate.

Step 2: After 10 minutes, add in the sour cream, melted butter, and salt to the dough. Mix this, with your hands, until all of the sour cream is combined (this does not mean kneading the dough).

Step 3: Cover the bowl again and let it sit for 2 hours. After 2 hours, punch down the dough and cover it again, letting it rest for another 2 hours.

Step 4: When the dough is ready, turn it out onto a lightly floured surface and divide the dough into 8-10 pieces.

Step 5: Working with one piece at a time, use your hands to stretch out the dough. Gravity is your friend here; stretch it like you would when making a pizza crust. Make sure you get the dough very, very thin, but don’t create too many holes.

Cooking on the stovetop:

Step 1: Heat a large skillet/griddle/cast-iron, on medium-high heat. Drizzle a little bit of olive oil into the skillet and lay a piece of dough onto it. Let this cook until the dough starts to puff up and bubble up in places. After about 3 minutes, flip the dough to the other side. Make sure that there are dark brown (lightly charred) spots on the side you just flipped up. If there aren’t any of these spots, this means you need to turn up the heat a little.

Step 2: Repeat the previous step with the remaining dough, adding oil when you need to.

Cooking in the oven:

Step 1: Preheat the oven to 500º F. Drizzle a cookie sheet with a good amount of olive oil and place 2-3 pieces of dough on it. Then drizzle the tops of the dough with more olive oil. Bake the flatbreads for about 8-10 minutes; until they are puffed up, crispy and golden brown.

Step 2: Repeat the previous step with the remaining dough.

Top the cooked flatbread with ricotta, the roasted veggies, some salt and chili powder.

Happy cooking!:)

Super Simple Sourdough

What do you do when there’s no yeast in sight at the grocery store? Panic? Nope. Just make yourself a sourdough dough starter and you’ll never have to rely solely on being able to find that pesky yeast packet at the grocery store ever again (well maybe not ever again, but you know what I mean).

There have been some false rumors going around about sourdough for a while now, and it’s time to set the record straight. Some seem to think that making sourdough is only for the crème de la crème of artisan bakers, no baking novice could possibly be able to wrangle such a difficult bread, but these ill-informed people couldn’t be more wrong.

All you need to create a loaf of delicious, crusty and tangy sourdough is time (and lots of it). The tangy trademark flavor of sourdough can only be achieved through a long proving (rising) period. It sounds crazy, but the whole process of baking a sourdough bread can take upwards of 7 days (thankfully this recipe only takes about 20 hours in total).

Did you know that the earliest written record of sourdough comes in the form of hieroglyphics of Egyptians making beer and bread that date back to 4,000 B.C.? For thousands of years, using a sourdough starter was pretty much the only way to make a loaf of bread. So, if up until 1942 (the year the first active dry yeast–the kind you know of that comes in a packet at the grocery store–was created) everyone made their bread by using a sourdough starter, then there is no reason why you can’t make bread that way too.

The first step to making any kind of sourdough is to make a sourdough starter. This starter is simply the combination of just two ingredients, flour and water. This flour and water mixture will eventually go through the process of fermentation, causing bacteria and wild yeast to grow. When the fermentation process begins in earnest, it will cause bubble to appear in your flour and water mixture. This bubbling mixture means that the sourdough starter is alive.

During fermentation, the bacteria that is created generates lactic acid and the wild yeast feeds off starches and flour, pumping the resulting carbon dioxide and acid and alcohol (ethanol) into the dough. This acid and alcohol (ethanol) is what gives sourdough its sour taste. That is why the tangy flavor of sourdough grows stronger the longer you proof your dough for; it simply has more time to give off even more ethanol (sorry for the science lesson, I’m done know).

On day one of making your starter, combine 60 grams of whole wheat flour and 60 grams of water in a glass jar. Mix the water and flour together with a fork and then cover the jar loosely with a cloth (I like to use a piece of cheese cloth) or with the jar’s lid just set on top (not twisted on). Leave this in a warm spot for 24 hours.

On day two, there might be some small bubbles that have popped up on the surface of your starter. These bubbles mean that fermentation has started (yay!). Sometimes, you won’t see any bubbles just yet and that’s totally fine! Don’t do anything to the starter today, just let it sit for another 24 hours.

It’s day three. You’re starting to get antsy, aren’t you? Hold tight, you still have a couple more days before you can actually use your starter. But at least today you get to feed your starter again. To do this, first take out and discard about half of your starter from the jar. Then add 60 grams of all-purpose flour and 60 grams of water. Mix the starter with a fork until smooth. Cover the starter again and let it rest for another 24 hours (huh. Sounds like my life: wake up, eat, sleep, repeat).

Okay, now it’s going to feel like Groundhog Day for a bit. On days 4, 5, and 6, you’re just going to repeat day three’s feeding process (take out and discard half of your starter and then feed it with 60 grams of flour and 60 grams of water). The starter will start to rise and bubbles will pop up on the surface and throughout the starter as the yeast begins to develop. Here’s a little nugget of information, when the starter falls, this means that it’s time to feed it again.

On day seven, you’re probably ready to just say, “Forget it. It was a nice idea, but I’m bored now.” But guess what? If your stater looks like it’s doubled in size and there are tons of bubbles in it, then it’s officially alive! Congrats! You’ve officially given birth to a gen-u-ine sourdough starter (if you didn’t instinctively say ‘genuine’ in a slow southern drawl in your head when you saw the hyphens, then I don’t think we can be friends)!

This is my bubbly starter, Olga.

If your started hasn’t doubled in size and there aren’t a lot of bubbles yet by day seven, don’t freak out. This just means that your starter needs a little more time to mature. Keep feeding it once a day and soon it will reach this stage.

One last thing, make sure you keep your jar clean (wipe the sides off every now and then) and before you use the starter in a recipe, make sure it passes the float test. To check to see if your starter passes the float test, after the starter has been fed and it has doubled in size, drop a teaspoon of starter into a glass or bowl of water. If the starter floats to the top it’s ready to use, if it sinks to the bottom, the starter needs more time before it can be used.

Okay, I lied. One more thing, if you keep your starter at room temperature, make sure you are feeding it everyday. If you are keeping it in the fridge, make sure you bring it out, remove and discard all but 50 grams of the starter and feed it, once a week.

Now, on to the moment that we’ve all been waiting for; making the actual sourdough bread. I’ve tried out a lot of sourdough recipes and by far, this is my favorite base sourdough recipe. It comes from the book, How to Bake, by Paul Hollywood (he’s a butt, but you have to admit, he does know a thing or two about bread). I always just cut this recipe in half because I only ever need to make one loaf (but if any of you ever want me to make you a loaf too while I’m making my own loaf, just let me know). Again, this recipe is in grams and millilitres, so please, please buy yourself a digital kitchen scale.

You can’t go wrong with a simple, plain sourdough bread, but sometimes I like to spice it up a little. I like to add about two or three teaspoons of pre-minced garlic (from a jar) and a tablespoon or two of rosemary (just the dried kind from a spice jar), for a garlic and rosemary loaf. One time, I even substituted the water for tomato juice in the recipe and added some garlic too. I ended up with a tasty tomato and garlic loaf that I have to say was pretty darn good. Sometimes, if I’m not feeling lazy, it’s really good to roast a whole clove of garlic and then put that in the garlic and rosemary loaf instead of the jarred garlic (just an idea for you to play around with). But honestly, you can add whatever your little heart desires to this basic sourdough recipe and it should taste fantastic!

You can add more water to this if you’re more experienced in sourdough making (a dough with higher hydration will give you a crumb structure that is more open and airy, but will also result in a dough that is harder to work with), but sticking to the lower water option produces a load that is just as nice.

If you don’t have a fancy banneton (proofing basket) for your second proof, you can just do what I do and modify a large mixing bowl. To do this, I place a heavily floured cloth/towel (the towel should be damp and then floured. Rice flour works best to coat the towel in as it has a grainier texture than normal flour. This more granular texture helps to avoid the loaf from sticking to the towel when it’s time to turn it out onto the baking sheet) in the bowl so that the towel isn’t touching the bottom of the bowl, and then put a rubber band around the bowl to hold the towel in place. This will enable the dough to sit in the towel suspended above the bottom of the bowl. Suspending the dough in this way will cause the dough to better hold its shape when it’s time to bake the bread (kind of like muscle memory).

My sourdough resting in the homemade banneton that I made.

Another point, some people like to bake their sourdough in a dutch oven because it is the closest you can get to mimicking a fancy steam-injecting oven without actually having one. To do this, put the dutch oven in the oven with the lid on while the oven preheats to 450 degrees F. Once the oven has reached this temperature, take out the dutch oven, add the bread, put the lid back on, throw it in the oven, and turn the oven temperature down to 400 F. After 20 minutes, take off the lid and bake for another 30ish minutes. While I love the great crust that you get from using a dutch oven, then bottom of the bread always burns when I cook my bread in one. To prevent this, you could place a cookie sheet on the oven rack beneath the dutch oven and it should do the trick.

You could also skip the dutch oven all together, instead, cooking your bread on a cookie sheet. If you choose this route, I would recommend that you place a roasting pan on the bottom oven rack when you preheat your oven. Then, when you put your bread in the oven, carefully pour about 1 and 1/2 cups of boiling water into the roasting pan below the bread and shut the oven door (do this all very quickly as you don’t want the steam you’ve just created to escape). This process, just like cooking your bread in a dutch oven, will help to create the moisture needed to develop that nice, thick crust that you want for your sourdough.

And that’s literally all I have for you about sourdough. The only really tricky part about baking sourdough is not to rush the process. Sourdough bread takes time; it’s part of its beauty.

Okay, I just have to slip in this one last fun fact about sourdough before I leave you. Did you know that there’s actually a sourdough library in St. Vith, a village in Belgium, that preserves strains of sourdough for the future? I know. Crazy, right? Here’s a NYTimes article about it: At the Sourdough Library, With Some Very Old Mothers.

Here is the super simple sourdough recipe:

Makes 1 loaf | Total time: about 17-20 hours

Ingredients:

  • 375 grams white bread flour
  • 250 grams sourdough starter
  • 8 grams of salt
  • 175 – 225ml lukewarm water
  • Olive oil for kneading
  • 2-3 tsp garlic from a jar (optional)
  • 1 – 2 TBS dried rosemary (optional)

Directions:

Step 1: In a large bowl, put in the flour, starter and salt. Then add in 175ml of the water and mix together with your hands (adding more water if you need to). Mix until it has become a soft, rough dough and all of the flour has been picked up from the sides of the bowl.

Step 2: Coat a clean worksurface with a little bit of olive oil and then tip the dough onto it. Knead the dough for 5 – 10 minutes. There will be an initial wet stage but keep working the dough and eventually the dough will form a soft, smooth skin. At this stage, if you want, gently knead in the garlic and rosemary.

Step 3: After kneading into a soft, smooth skinned dough, place it into a lightly oiled bowl and cover tightly with plastic wrap. Leave the dough to rise for 5 hours, or until it has doubled in size.

Step 4: Cover a damp towel with a heavy coating of rice flour (preferably) or regular flour. Then place the towel into a clean, deep bowl with the ends of the towel draping over the sides of the bowl. Make sure the center of the towel (in the center of the bowl) isn’t touching the bottom of the bowl, this way, when the dough is dropped onto the towel in the bowl, it will be suspended in the air, which will help it to hold its shape when baking later on. Then put a rubber band around the bowl and towel, securing the towel in place. This is a homemade bread banneton. If you have a bread banneton, just use this, heavily floured.

 Step 5: Tip the risen dough onto a lightly floured work surface and fold it inwards repeatedly until the dough is smooth and all of the air has been knocked out. Turn the dough in a circular motion on the work surface to form the dough into a smooth ball shape.

Step 6: Place the dough ball into the banneton and dust with more flour on top. Put the banneton with the dough into a plastic bag (I use a large oven bag) and leave to rise for 10 – 13 hours, or until the dough has doubled in size and springs back when poked lightly with your finger.

Step 7: When the dough is ready, put a roasting pan in the oven on the bottom rack and preheat your oven to 400º F. Line a cookie sheet with baking parchment and bring 1 and ½ cups of water to a boil.

Step 8: Turn the risen dough upside down so the wrinkled underside is on top. Put the loaf onto the cookie sheet and cut a deep slash across the middle of the loaf.

Step 9: Place the loaf into the oven. Then pour the boiling water into the roasting pan on the lowest oven rack, beneath the loaf, and shut the oven door. This will create the steam in the oven needed to achieve a heavy crusted bread (do this step as quickly as possible as to not let out too much steam from the oven).  Bake for 30 – 40 minutes until the loaf is golden brown and sounds hollow when tapped on the bottom. Cool completely on a wire rack before digging in.

**You can also bake the bread in a dutch oven. When you start preheating your oven, place your dutch oven into the oven with the lid on. After 30 – 45 minutes (assuming the oven has heated up all the way), take out the dutch oven, line it with parchment paper and place the loaf inside. Then put the lid back on the dutch oven and put it back in the oven. Place a cookie sheet into the oven, as well, on the lowest oven rack (this will prevent the bottom of the bread from burning in the dutch oven). Bake for 20 minutes with the lid on and then take off the lid and bake for an additional 10 – 20 minutes, until the loaf is golden brown and hollow sounding when tapped on the bottom.

Happy baking!:)

Heavenly Everything Bagels

I don’t know about you, but just the thought of a warm, salty and garlicky everything bagel makes my stomach grumble. Add some cream cheese and lox and I’m salivating like a dog. These bagels, hand over heart, are what dreams are made of.

One of my favorite parts about visiting New York City is the fact that a good bagel place is always just a stone’s throw away from you no matter where you’re at. And the absolute best lox sandwich on an everything bagel, hands down, is at Ess-a-Bagel,I swear. I know I said earlier that I’m a vegetarian, but I guess I have a problem with authority because no one (and I mean NO ONE) can tell me that I can’t have a bagel with lox, no matter who you are. The soft and salty lox mixed with cream cheese and a chewy, garlicky and salty everything bagel is just not something that I’m okay with forgoing.

That said, about a week ago the cravings for an everything bagel with lox and cream cheese began in earnest. And the other day, I just couldn’t fend them off any longer, so I found a bagel recipe in my cookbook, Crumb, by Ruby Tandoh (Yes, Ruby from one of the earlier seasons of the Great British Baking Show. I’m kind of obsessed with that show) that didn’t look too daunting.

Ruby’s recipes are so easy to follow and delicious! This book’s definitely gotten a workout since I bought it.

I had always thought that making bagels would be a tricky process because there’s boiling water involved, but it turns out that I was really wrong. Bagel making, while not a walk in the park, isn’t too difficult to try your hand at. I had to make a couple of tweaks to Ruby’s recipe because I sadly didn’t have the rye flour or caraway seeds that the recipe called for, but the results still made me feel as if I was in bagel heaven, and I daresay, were slightly better than they would have been with the addition of rye.

Now you’ll have to forgive me, this recipe is in grams and millilitres because the book I have was published in the U.K. (and I was too lazy to figure out what each measurement was in cups, sorry!). I would recommend just getting a small kitchen scale from Target (that’s where I got mine); the cheapest one they have (mine) is $14.99. I promise, having a digital kitchen scale will definitely come in handy down the road!

Just a word of caution, bagel dough is meant to be dryer than normal bread dough, so don’t get scared if it’s tougher and not as sticky as you think a dough should be (I freaked out about how dry my dough was, but the bagels turned out just fine!). I’m not going to lie, it took everything in me not to add more water to my dough because I couldn’t believe that a bread dough was supposed to be that tough and dry, but it is 100% supposed to be that way. DON’T ADD EXTRA WATER.

After willing yourself not to add extra water and letting the dough rise (built in nap time), it’s dough shaping time. This part is a breeze. You just divide the risen dough into eight pieces, form each one into a ball and then, taking one at a time, use your fingers to punch a whole through the center of the dough ball. Once you’ve made a hole, stretch the dough all the way around, moving it in a circle (making the hole bigger and bigger as you stretch it), until you have something that resembles (even vaguely, it’s all about creative interpretation, right?) a bagel.

If you have polenta just chilling in your pantry (I have no idea why, but I surprisingly did–polenta is actually really good if you cook it right, but that’s for another post) you can spread some of it over a cookie sheet and lay your beautifully shaped bagels on top. The polenta will keep the dough from sticking to the pan, but if you don’t have polenta, no worries, just use some flour instead.

Bagels sittin’ pretty on a bed of polenta.

Now comes the fun part. Boiling! It might also be called poaching the bagels…I’m not quite up to snuff on all the correct bagel lingo and terminology. Nonetheless, once you’ve got your pot of water boiling, it’s time to add the baking soda. When you add it, the water will fizz up a little like you’re pouring pop into a cup. I don’t know, I thought it was kind of fun to watch (a little chemistry to help you get through your day). Then you just add your dough, one at a time, and let it sit on each side for about a minute or so. This time in the water is what gives a bagel its trademark chewiness. If you’re ever on Jeopardy! and that’s the answer to one of the questions, you’re welcome.

This bagel’s just floating away on it’s spa getaway.

After their 60 seconds on each side, the bagels go back onto a greased or parchment paper lined cookie sheet, get brushed with water and finally adorned with a generous amount of everything seasoning (the more the better in my book). You can use either store-bought seasoning or homemade (I just googled everything seasoning and made my own, but if you already have some laying around, just use the pre-made stuff!).

Almost too pretty to eat. ALMOST.

Then you’re good to go! Just bake them in the oven at 355º F for 20-25 minutes and voilà! You have yourself some scrumptious homemade bagels just waiting to be eaten with a healthy heap of cream cheese, a hardy helping of lox, and a sprinkling of crunchy capers, or however you prefer your bagels (they’re your bagels, do with them what you wish. As long as it’s legal, that is).

So yeah, that’s all there is to it. Sorry bagels, I’ve just outed you; you’re not as tough to make as you like people to think you are.

I feel kind of like a professional bagel maker now. Maybe I should make people call me Bruegger now, what do you thing? Next time you see me, I’ll have legally changed my name unless I hear I should do otherwise.

In all seriousness though, I hope you try out making homemade bagels for yourself. They’re absolutely worth the trouble!

Here’s the recipe:

Happy baking!:)

Leek and Mushroom Cottage Pie

So, you don’t know what a cottage pie is? I didn’t either, but now that I do, I don’t want to live in a world without it.

My dad has always been what one would call a meat and potatoes kind of guy; preferring that every meal to contain meat in one form or another. When meat’s missing from his dinner or lunch he says, “You know what would make this really great? Some (insert your choice of meat here)!” It drives me crazy.

Being his daughter, I grew up with chicken or ground beef in my dinner almost every night, so it astounds him that his only daughter could be a vegetarian (most recently turned pescatarian because of the goodness that is bagels and lox), simply because I don’t like the taste of meat.

The first time I made this mushroom and leek cottage pie, my dad was dumbfounded. He couldn’t believe it was vegetarian, “I can’t even tell there’s no meat in this!” When he uttered these words, I know it sounds dramatic, but I was shocked. I’d never gotten a response like that from him when I’d cooked dinner in the past.

Since then, I’ve been scouring the internet for ways to get that meat-like sensation into foods to make my cooking more appealing to meat-lovers. The secret, I’ve found, is mushrooms. LOTS and LOTS of mushrooms.

Mushrooms have this meat-like taste because, like meats and broths, they have a strong umami flavor. Umami is a Japanese word which translates to “pleasant savory taste.” So long story short, if you want to make vegetarian food that your non-vegetarian friends and family will love, the key is to throw in all the mushrooms you can to whatever you’re making. Oh, and soy sauce and tomatoes too.

Soy sauce and tomatoes are two more of those sneaky, ninja vegetarian foods that pack a killer punch in the umami department. So that’s just a thought for all you people out there, mushrooms, soy sauce and tomatoes.

Now back to the real star of the show, the mushroom and leek cottage pie. A cottage pie (sometimes called a Shepherd’s pie and even more rarely called a hachis parmentier, thanks Wikipedia) is usually made with a ground meat of some kind that is cooked in a sauce with onions, smothered with a layer of yummy mashed potatoes on top, and then thrown in the oven to bake. It’s a very wintery and comforting kind of dish that makes you feel all warm and cozy on the inside.

The recipe I use substitutes out the ground meat for creamy mushrooms and leeks. While there’s no meat, this pie still has a rich, thick sauce, with a nice carroty crunch. The garlic mashed potatoes dolloped on top are by far the best thing about this pie. I personally don’t like big lumps in my mashed potatoes. I prefer a nice, smooth mash, but the consistency of your mashed potatoes is entirely up to you, no potato police here.

Once the pie’s in the oven, the top of the potatoes will crisp up giving you a little bit of a crunchy texture to combat the softness of the mushroom and leek mixture below.

I found this recipe on the New York Times Cooking website and made a couple of tweaks to it by adding in some carrots for crunch, lots of garlic to the mashed potatoes and some spice for a little extra kick. It’s a really easy dinner to throw together; who doesn’t love some mashed potatoes?!

Here’s the Mushroom and Leek Cottage Pie recipe:

Happy cooking!:)

Feel-good Lasagna

Have a bad day? Or maybe a great day that needs celebrating? No matter the occasion (or for no occasion whatsoever) this lasagna is the answer. This is a no-frills, back to the basics lasagna because it’s a classic (and there’s a reason for that, so let’s keep it that way).

Lasagna is one comfort food that never ceases to disappoint. You can try to jazz it up with different spices or by subbing Alfredo for tomato sauce, but 9 times out of 10, it will never live up to the original, tried and tested lasagna. That said, this recipe isn’t going to stray very far from tradition (besides the addition of a few (VERY FEW) anchovies), but I can guarantee you that it will taste fantastic.

I found this recipe in another one of my quarantine-induced boredom online-shopping purchases (my bank account is not on speaking terms with me at the moment) called, Nothing Fancy, by Alison Roman. At first, I, too, was skeptical that there was nothing in this recipe with flashing lights saying, “Notice me! I’m different!” There was no special spice added or new-fangled sauce, it was just your basic lasagna recipe.

Love this book, but my bank account is hurting.

After cooking it, however, I realized that this lasagna is anything but basic. The sauce isn’t straight out of the jar, it’s made from scratch–cooked down for about an hour from two cans of tomatoes, a diced onion, some garlic, a couple of anchovies, salt and pepper, and a dash of basil. This sauce isn’t to be rushed; it’s a marathon, not a sprint. If you try to rush the sauce, it won’t be as thick as it needs to be in order to impart the intense tomatoey (is that even a word?), rich flavor typical of a memorable lasagna.

Is she memorable? I think so.

The anchovies, although optional, add yet another layer of flavor to the sauce; giving it a meaty taste without adding any ground beef to it (another sneaky attempt to get my dad to think there’s meat in a food when in reality, there’s not). I wasn’t completely sure if I was going to add the anchovies in or not; I went back and forth for a while, but at the last minute I decided just to go for it. I am so happy that I did because if I hadn’t added them, I don’t think that the sauce would have had that detectable umami flavor that made it seem almost meaty.

So, I’ve talked a lot about the sauce, now its on to the noodles. There’s not a whole lot to say here besides the fact that you only need to boil them for about 4 minutes. This short boiling time is because the noodles will continue to cook in the oven once the lasagna has been assembled. Ignore every voice in your head saying that the noodles need to cook for longer and just drain those bad boys after the 4 minutes of boiling. Just trust the system here.

This next part is for all those cheese lovers out there. Besides the sauce, what makes a great lasagna standout from its lesser counterparts is the cheese mixture. A lasagna wouldn’t be a lasagna without that creamy, cheesy ricotta layer breaking up the noodles and sauce, and this recipe is no exception. This is not for those unfortunate lactose intolerant souls out there, that’s for sure. Not only is there 2 cups of ricotta, but there’s 6 cups of shredded mozzarella, 1 cup of grated Parmesan and a little heavy cream in there to bind all those yummy cheeses together. Let me tell you, I honestly could sit there and just eat the cheese mixture all by itself, it’s that good.

Okay, one last thing. So, I don’t know if this is just an operator error (a solely just me problem) or if this happens to everyone, but whenever I’ve made lasagna in the past, it has never (not once!) all fit into a single glass dish. There’s always about three more layers that I have to throw into a smaller dish to freeze for a dinner later on down the road. While this isn’t a real issue (I can always use a quick freezer meal that’s all ready to go and just needs to be popped into the oven), it’s just annoying. All I want is to have all of those yummy layers to fit into one single dish (maybe I just need to buy myself a deeper dish, but that’s beside the point)! Anyway, if your dish is the same size as mine, you’ll run into the same problem, but that just means you have one more delicious lasagna ready to go to enjoy in a week or two.

I lied. Now this is the last thing I want to say, listen when the recipe says to bake the lasagna twice. The first bake goes in with a piece of aluminum foil on over the dish in order to melt all of those gorgeous cheeses and the second bake (with the foil off) is meant to make the lasagna all crispy and brown on top; just the way grandma used to make it. So, do not, for the love of god, skip the two bake process. What I said earlier for the sauce is apt for this situation too: it’s a marathon, not a sprint. Bake the shit out of that lasagna–the crispier and browner, the better.

That’s all I have to say about this lovely, lovely lasagna; except, please try this because I’m telling you, it’ll knock your socks off.

Where’d your socks go? Oh, right. They were knocked off.

Here’s the Feel-good Lasagna recipe:

Serves 6-10 (depending on peoples’ appetites) | Total time: 2 hrs 15 min

INGREDIENTS:

For the sauce:

  • 2 TBS olive oil
  • 1 large onion (yellow or whatever you have), chopped
  • 4 garlic cloves, minced
  • 6 anchovy fillets (optional)
  • Salt, pepper, basil and Italian seasoning, to taste
  • 2 TBS tomato paste
  • 1, 28 oz. can of whole peeled tomatoes
  • 1, 28 oz. can of crushed tomatoes
  • A dash of hot sauce

For everything else:

  • 6 cups of shredded mozzarella
  • 2 cups (16 oz.) of ricotta cheese
  • 1 cup of grated Parmesan
  • ¼ cup of heavy cream
  • Salt, pepper, basil, and a dash of Cajun seasoning, to taste
  • 1 box (1 lb) of lasagna noodles

DIRECTIONS:

  • Step 1: To make the sauce, on medium heat and in a large pot, heat the olive oil. Then add the onion, garlic and anchovies. Season this with salt, pepper, a little basil and Italian seasoning. Cook until the onion is soft and translucent. This should take around 8 to 10 minutes, stirring occasionally.  Once translucent, add in the tomato paste and stir for about 2 minutes (the paste will turn a deep red color).
  • Step 2: Open the whole peeled tomato can and crush the whole tomatoes into smaller pieces (ones that are bite-sized) using your hands. Then add these and the can of crushed tomatoes to the pot. Fill one of the now empty tomato cans halfway with water and dump this into the pot too. Season with salt, pepper and basil. Bring the tomato sauce to a simmer and cook for about 45 minutes; until the sauce has thickened to the consistency of a jarred pasta sauce. During this time, stir the sauce occasionally.
  • Step 3: Preheat your oven to 425º F and bring a large pot of boiling water to a boil. Make sure this water is generously salted.
  • Step 4: To construct the lasagna, start out by combining all of the cheeses (the ricotta, only 5 of the 6 cups of mozzarella, and Parmesan) with the heavy cream. Season this with salt, pepper, a little basil and Cajun.
  • Step 5: Cook the lasagna noodles in the boiling water for only 4 minutes. By only cooking the noodles this short period of time means that they will not be all the way cooked through. The noodles will finish up cooking in the oven after the lasagna has been assembled. Drain the noodles and separate any noodles that are trying to stick together; this will make it easier when assembling the lasagna.
  • Step 6: This is when the real lasagna construction begins. First, spoon a little bit of sauce on the bottom of a 3 qt baking dish. Cover this with a layer of noodles (try not to overlap the noodles too much). Top the noodle layer with a good couple of ladles full of sauce, followed by a layer of the cheese mixture (use about a fourth of the mixture). Top with another layer of noodles and then repeat these steps three more times (or until you’ve reached the top of your dish). End with a layer of noodles followed by a dollop of sauce and then top this with the leftover 1 cup of mozzarella cheese and a little extra Parmesan.
  • Step 7: Cover your dish with aluminum foil and place this on top of a baking sheet (to catch any lasagna that might bubble over while the lasagna’s cooking). Then slide the whole thing in the oven and bake for about 30 minutes. Once these 30 minutes are up, the pasta should be completely cooked through and the sauce should be bubbling up around the edges. At this point, take off the aluminum foil from the top of the lasagna and continue to bake it for another 35 to 45 minutes (until its nice and brown and crispy on top). Make sure to let it cool slightly before digging in.

Happy cooking!:)

Killer Kickin’ Kimchi

Kimchi is a magical example of fermentation at work. Fermentation is a beautiful thing when making beer and sourdough starters, but once you try kimchi, it’ll be your new favorite fermented food. I promise!

For me, as I’m sure for many others too, this time in quarantine has made me really nostalgic for a time not too long ago when we could freely go out to restaurants for dinner and spend time eating with people other than only those we live with. Just the atmosphere of a restaurant and the idea of spending time with friends made eating fun. Now, dinnertime just feels like one more mundane task to get through after a long day of staying at home. Dinner needs to become fun again, so I’ve been racking my brain for something different and punchy to spice things up (both figuratively and literally).

There’s one thing that I’ve been wanting to make myself for a long time that ticks the exciting column due to in part to both its taste and appearance. And that is Kimchi.

Kimchi is a Korean cuisine staple of salted and fermented vegetables, like napa cabbage and Korean radish, that can be mixed with many different seasonings, such as gochugaru (Korean chili powder), spring onions, garlic, ginger, etc. I like kimchi because it’s so versatile; I can have it as a side dish, add it to soup, put it in an omelet, or just eat it right out of the jar.

Food with Asian influences and a long shelf life have always held a special spot in my heart (and stomach), and I’m happy to report kimchi satisfies both requirements. It can be stored in a jar in the refrigerator for up to a month, and to make Kimchi even more appealing, it gets better with age. The longer it sits, the tangier and stronger its flavor becomes.

Kimchi fermenting away in the fridge.

I recently purchased a cookbook (during one of my many quarantine-induced boredom online-shopping sessions) by the New York Times food columnist, Alison Roman, called Dining In (it has so many great recipes, there will no doubt be more posts to come from it), and in it there’s a recipe for kimchi.

My new favorite quarantine past-time is paging through this book over and over again.

Roman’s kimchi recipe calls for napa cabbage over Korean radish, so if you’re one who prefers your kimchi crunchy, I would substitute Korean radishes for the head of napa cabbage that this particular recipe calls for. One more note, kimchi is usually spiced with the Korean chili powder, gochugaru, but if you don’t have that, it’s totally fine, just use red chili flakes instead (your kimchi, like mine, just won’t have the red coloring of traditional kimchi).

This will make a mildly spicy kimchi (you can always add more chili powder or red pepper flakes for additional heat) that’s also slightly sweet. This sweetness comes from the addition of an Asian pear, adding yet another level of flavor to your kimchi.

Need some exercise during this quarantine time with the gyms closed and overly strenuous exercise discouraged? Well, kimchi can solve that problem for you too. So roll your sleeves up and harness your inner masseuse because when making kimchi you have to massaging the heck out of that cabbage. You have to do this because massaging the cabbage it will cause it to shrink down to a much more reasonable-looking and manageable size.

When you first get out your cabbage, slice it up and put it in the bowl, if you’re anything like me, you’ll be saying, “There’s absolutely no way I need this much kimchi!” but trust me, once you put in a little sweat-equity, you’ll see that it’s the perfect amount. So don’t be afraid of overdoing it, just really get in there and massage that kimchi as if your life depends on it. Your kimchi will reward you for your effort later.

I feel like I’ve said the word ‘kimchi’ so many times that at this point, the word’s lost all meaning (Kimchi! Kimchi! Kimchi!). I swear though, if you’ve never had it, please, please, please, give kimchi a try. It’ll give you the chance to spice up dinnertime and make eating exciting again, while also helping you to get in your workout for the day. You won’t regret it!

I like to just eat it right out of the jar.

Here’s the recipe I used from Dining In:

Happy fermenting! 🙂